Have you ever turned on your tap and wondered why your water leaves a strange residue or tastes a bit off? You’re not alone. Many homeowners are in the same boat, grappling with the hidden challenges of hard water. It’s a sneaky culprit behind so many household annoyances, from spotty dishes to that unmanageable hair day. But fret not! In this deep dive, we’re going to unlock the secrets of hard water. More importantly, I’ll guide you through the surprisingly easy process of testing for hard water using hard water test strips. So, buckle up and prepare to become a hard water detective in your own home. It’s easier than you think, and I promise, the journey is as rewarding as it is enlightening.
Understanding Hard Water
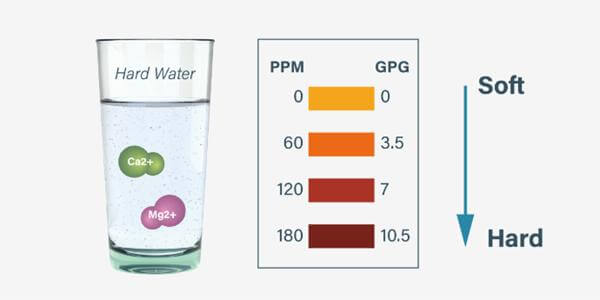
Before we jump into the world of test strips and hard water mysteries, let’s take a moment to understand what hard water really is. Simply put, hard water is just regular water but with a higher concentration of minerals, particularly calcium and magnesium. These minerals are naturally occurring and generally harmless to health, but they can be quite the troublemakers in your household. From leaving unsightly stains on your clean dishes to making your hair feel like straw, hard water often plays the invisible antagonist in our daily routines. But here’s the good news – identifying and managing hard water is not a Herculean task. With the right tools and knowledge, which I’m going to share with you, you can easily turn the tides against this mineral menace. Stay tuned, because we’re about to embark on a journey to make your water work for you, not against you.
Introduction to Hard Water Test Strips
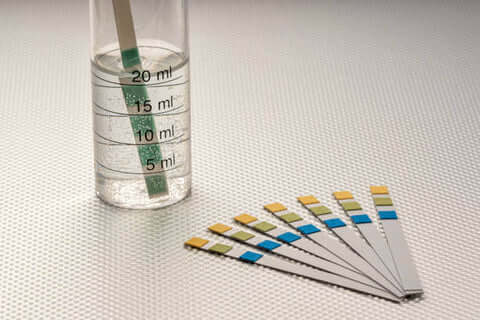
Now, the hero of our story: hard water test strips. These little wonders are the key to unveiling the hardness of your water with minimal fuss. Think of them as litmus tests for your taps. They work by changing color based on the mineral content in your water, giving you a quick and clear reading of just how hard your water is. The beauty of these test strips lies in their simplicity. No need for bulky equipment or waiting days for lab results. You get to play the scientist in your own home, with results in just minutes. Whether you’re a busy parent, a homeowner, or just someone curious about the quality of your water, hard water test strips are your first step towards a solution. In the next sections, I’ll guide you through choosing the right strips, using them correctly, and most importantly, understanding what those colors mean for you and your home.
Choosing the Right Hard Water Test Strips
But before we get our hands wet with the testing process, let’s pick the right tool for the job. Selecting the ideal hard water test strip might seem daunting at first, but it’s quite straightforward. The market offers a variety of strips, each tailored to different needs and sensitivities. Some are basic, great for a quick check, while others offer a more detailed analysis, like pinpointing specific mineral levels. The key is to find a balance between ease of use and the level of detail you need.
Step-by-Step Guide to Using Hard Water Test Strips
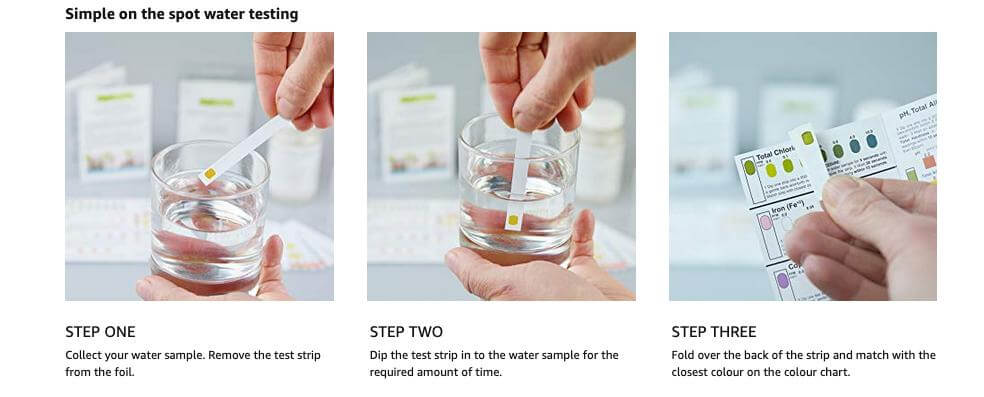
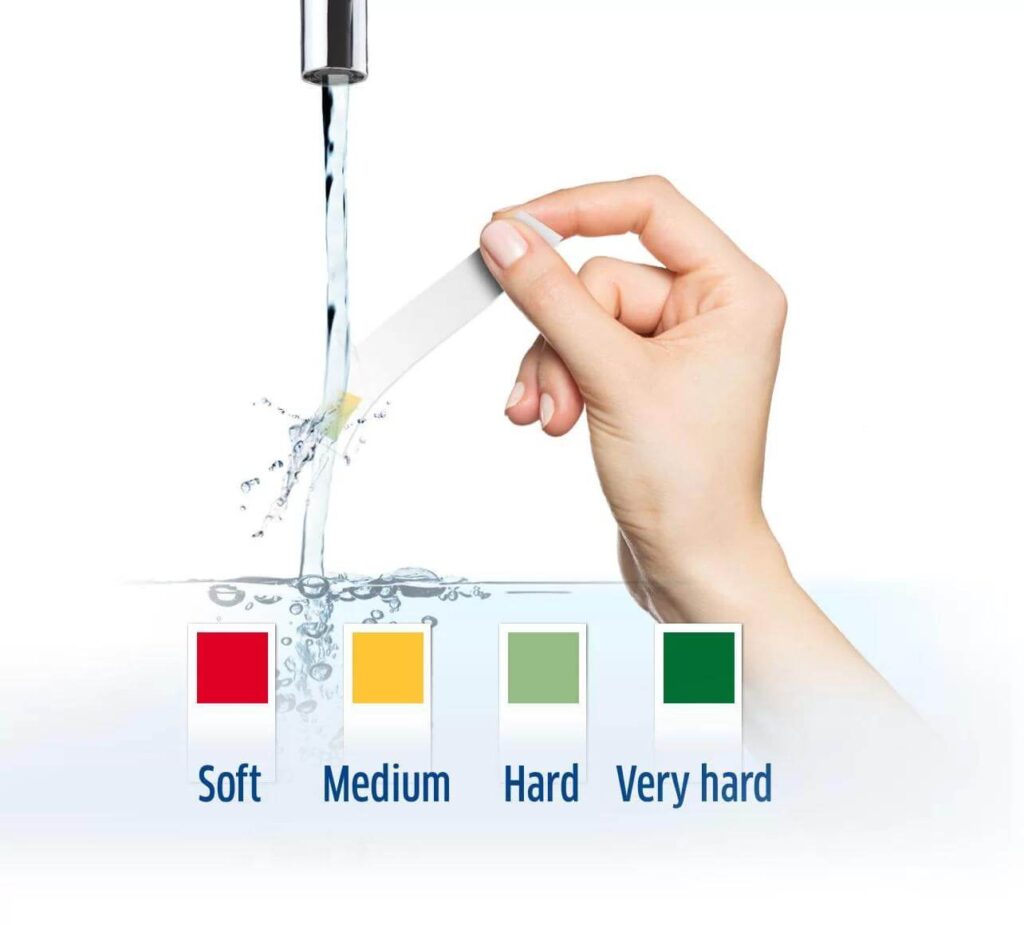
Once you’ve got your chosen hard water test strips in hand, it’s time to play detective. Using these strips is a breeze. You’ll simply run your tap for a few moments, dip the strip into the water, and then watch as it changes color. The color change corresponds to the level of hardness of your water, measured in grains per gallon (GPG) or parts per million (PPM). This is where the magic happens – those colors are revealing the invisible story of your water. In the following section, I’ll walk you through each step of this process in detail, ensuring that you can conduct the test with confidence and precision. We’ll also delve into how to interpret these colors accurately, so you can truly understand the story they tell. After all, knowledge is power, especially when it comes to managing the quality of your home’s water.
How is Water Hardness Measured?
Water hardness, a measure of mineral content, is commonly expressed in grains per gallon (gpg), milligrams per liter (mg/L), or parts per million (ppm). Understanding these units is key to interpreting water hardness test results.
Let’s break it down:
- Grains per Gallon (gpg): This unit is akin to the weight of a single grain of wheat, roughly 1/7000th of a pound. It’s a traditional measurement used in the U.S.
- Milligrams per Liter (mg/L) or Parts per Million (ppm): Both these units are equivalent and widely used in scientific contexts. In terms of water hardness, 1 ppm means that out of a million units, one unit is a mineral causing hardness.
To convert between these units, remember that 1 gpg is equal to 17.1 ppm (or mg/L). So, if a water test reports hardness in mg/L or ppm, you can find the equivalent gpg by dividing the number by 17.1. For example, a hardness of 182 mg/L is equivalent to approximately 10.6 gpg (182 ÷ 17.1).
Furthermore, to calculate water hardness in mg/L, you can use the following formula, which takes into account the levels of calcium (Ca) and magnesium (Mg), the main contributors to water hardness:
Water Hardness (mg/L)=Ca (mg/L)×2.497+Mg (mg/L)×4.118
In this formula, multiply the calcium content in mg/L by 2.497 and the magnesium content in mg/L by 4.118, then sum these values to get the total water hardness in mg/L. This calculation provides a comprehensive view of the water’s hardness due to these two prevalent minerals.
Decoding the Test Results
Interpreting the results is where things get interesting. The color your test strip turns isn’t just a random shade; it’s a direct reflection of your water’s hardness level. Each color corresponds to a range on the hardness scale, allowing you to gauge just how hard your water is. But what do these levels actually mean for you? In simple terms, the harder your water, the more minerals it contains, and the more issues it might cause in your daily life. A higher reading could explain why your soaps and shampoos aren’t lathering properly, or why your appliances are scaling up. In the next part of our guide, I’ll help you decode these colors, translating them into actionable insights. Whether you’re dealing with mildly hard water or the kind that could give a rock a run for its money, you’ll know exactly what steps to take next. So, let’s turn these colorful clues into a clear action plan for your home.
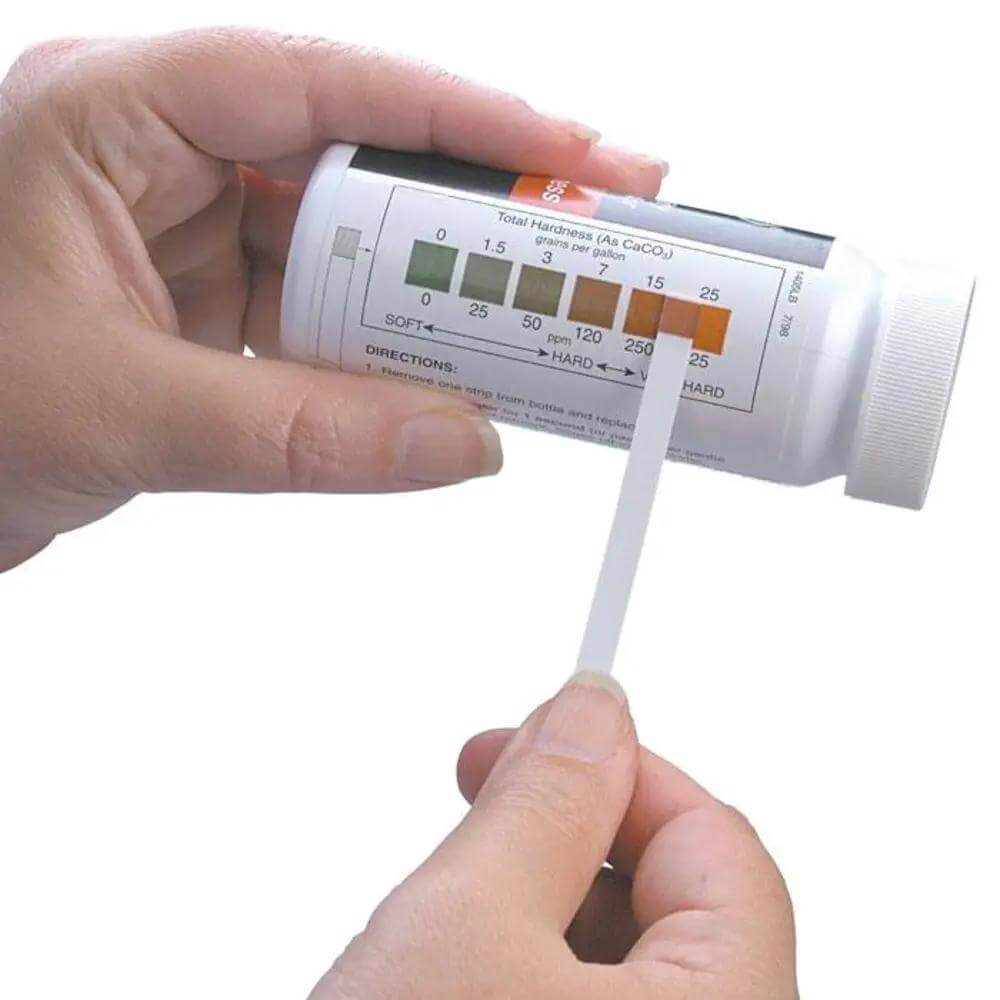
The U.S. Geological Survey uses the following scale to determine the hardness of the water. Note the value of the calcium carbonate in your water quality report or your test kit results and compare it to the scale below.
| Classification | Mg/L or ppm | Grains per Gallon (gpg) |
| Soft | 0 – 17.1 | 0 – 1 |
| Slightly hard | 17.1 – 60 | 1 – 3.5 |
| Moderately hard | 61 – 120 | 3.5 – 7.0 |
| Hard | 121 – 180 | 7.0 – 10.5 |
| Very hard | 180+ | 10.5+ |
In short, if your hard water test result is less than one grain per gallon (17.1 mg/L or less), you have soft water. Anything higher than this value indicates hard water.
Solutions and Next Steps After Testing
After decoding your water’s hardness level, the next step is tackling the problem head-on. Depending on the severity of your water’s hardness, your approach can range from simple at-home solutions to considering a full-scale water softening system. For those with mildly hard water, small changes like using different washing detergents or installing faucet filters might suffice. But for homes grappling with significantly hard water, more robust solutions, like a water softener, might be necessary. These systems effectively reduce mineral levels, thereby mitigating the effects of hard water. In the upcoming sections, I’ll guide you through various solutions, tailored to different levels of water hardness. Whether you’re looking for a quick fix or a long-term solution, you’ll find practical, effective strategies to make hard water a thing of the past in your home. With the right approach, you can protect your appliances, improve your water quality, and maybe even make that morning shower a little more refreshing.
Conclusion
In conclusion, the journey from detecting to managing hard water in your home doesn’t have to be a daunting task. Armed with the right test strips and a newfound understanding of what those results mean, you’re well-equipped to tackle the challenges posed by hard water. Whether it’s making small adjustments in your daily routine or investing in a water softening system, you now have the knowledge to make informed decisions that suit your needs and lifestyle. Remember, the goal here is not just to combat the effects of hard water but to enhance the overall quality of life in your home. So, take these insights, apply them to your unique situation, and enjoy the benefits of softer water. From clearer dishes to softer skin, the changes can be both subtle and transformative. Thanks for joining me on this watery adventure – here’s to clearer, kinder water in your home!
As we wrap up our exploration into the world of hard water, it’s important to remember that regular monitoring is key. Your water’s hardness can fluctuate over time due to various factors, including changes in your municipal water supply or shifts in groundwater sources. By routinely testing your water with your trusty test strips, you stay ahead of these changes, ensuring that your solutions remain effective and your home continues to run smoothly. Think of it as a regular health check-up for your home’s water system. With each test, you’re not just preventing potential issues, you’re also ensuring the longevity and efficiency of your appliances and plumbing. So, keep those test strips handy, and embrace your role as the guardian of your home’s water quality. Here’s to clear water, clear pipes, and clear solutions!
FAQs
- What is hard water?
- Hard water is water that contains a high concentration of minerals, primarily calcium and magnesium. These minerals are natural but can cause various household issues.
- How does hard water affect daily life?
- Hard water can lead to problems like scale buildup in pipes and appliances, reduced soap and detergent efficiency, skin and hair dryness, and spotty dishes and laundry.
- What are hard water test strips?
- Hard water test strips are simple, color-changing strips used to measure the mineral
content and hardness level of water. They change color when dipped in water, indicating the hardness based on the concentration of minerals.
- How do I use hard water test strips?
- Run your tap water for a few moments, dip the test strip into the water, then compare the color change on the strip to the provided chart to determine the water hardness.
- What do the colors on the hard water test strip mean?
- The colors indicate the level of water hardness. Each color corresponds to a range on a hardness scale, which can be matched with the provided chart to determine the hardness level in grains per gallon (GPG) or parts per million (PPM).
- How often should I test my water for hardness?
- Regular testing is recommended, especially if you notice changes in water quality or if your area is prone to water hardness fluctuations. Testing every few months is a good practice.
- What can I do if my water is hard?
- Solutions range from using different cleaning products to installing water softeners. For mildly hard water, faucet filters or different detergents might help. For very hard water, a water softening system might be necessary.
- Are there any health risks associated with hard water?
- Hard water is generally not harmful to health. However, it can cause dry skin and hair and may affect people with certain skin conditions.
- Can hard water damage my appliances?
- Yes, hard water can lead to scale buildup in appliances like water heaters, dishwashers, and washing machines, potentially reducing their efficiency and lifespan.
- Where can I buy hard water test strips?
- Hard water test strips can be purchased at most home improvement stores, supermarkets, or online. Prices and brands vary, so it’s advisable to research and find the strips that best suit your needs.
